This is an old revision of the document!
Table of Contents
Description
The Ion Beam Etcher has a collimated monochromatic broad-beam ion source (Kaufman type) that can be used for ion etching / ion milling. The beam diameter is 4 cm. Working pressure is 3-4 e-4 mbar. The maximum beam current is 10 mA and the maximum energy is 1500 eV. For resist processing typically low energies are used to avoid damage to the imaging resist.
The system is equipped with a loadlock with a (sputtering gun, removed jan 2012) knudsen cell so that a deposition step can be performed immediately after etching (a so called self aligned process). The substrate table can be tilted and can rotate in the tilt plane.
Manual Ion beam etcher
Mounting sample on holder
- If rotation is required (to avoid 'ears') use the holder with the rotation option.
- Glue the sample on the holder with silver paint (Dry for ~10 mins)
Insert sample
- Turn off the Penning pressure gauge, by pressing HV.
- Press TM to switch to the Pirani pressure gauge.
- Turn off the turbo (set switch to down position)
- Close valve to the rotary pump (attached to the turbo).
- Switch to the DM pressure gauge.
- Wait until the turbo has slowed down (you can let in some gas to speed this up, 1e-1 mbar max).
- Vent the chamber to atmospheric pressure and close venting valve.
- When the chamber is at atmospheric pressure, check if shutter is closed and open the chamber.
- Slide the sample holder onto the cooling stage and close shutter.
- Check rotating table (max 1 volt - although 0.5 is usually enough, current 20mA or so)
- Close the chamber.
Pumping down
- Open the valve to the rotary pump (attached to the turbo).
- Flip TP switch up to start the turbo pump.
- At 10 mbar switch to TM pressure gauge.
- Make sure green valves is closed, set black valve to ““IBE”” and open needle valve. Never turn this to “RIE”, because this is an unconnected conduct, which will cause air to flow into the Argon conducts.
- Wait (~30 mins) until pressure is <1.0e-5 to 1.5e-5 mBar. The turbo pump should now be at maximum speed.
Etching
- Cool with N2 if needed (Resist can become too hard to remove if not cooled, especially if you etch longer than 4 min).
- Check if N2 barrel needs to be refilled.
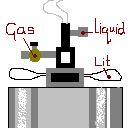
- Attach Hose
- close lit of N2 barrel
- close gas outlet (warning: danger of explosion if all outlets are closed) and wait
- open liquid outlet
- the tubes should fill and due to the cold condense and freeze on the outside (if you shake the barrel a bit, the N2 heats up and the barrel should pressurize faster).
- When the N2 sputters out the exhaust, close the liquid outlet.
- open gas outlet. (You can optionally open the lit).
- Turn on power to rotating table (1 volt), otherwise the rotation might not work at low temperatures.
- Note the base pressure in the Logbook.
- Open green valve
- Set Argon pressure to 2,5e-4 to 4.0e-4 mBar with program on the computer
- If you can't find the computerprogram to do this, switch the screen to the IBE computer.
- If you are on the right computer but the software seems to be closed, you can find the program by clicking on the terminal icon on top of the desktop. Type 'cd MFC/code', press 'enter', type 'python debiantest.py' and press 'enter' again. Enlarge the appearing window!
- Turn on main power for ion beam (watch safety fuse)
- Select recipe (#10)
- press 'select recipe'
- press '+' and '-' to select the right recipe on the LCD.
- press 'enter'
- press 'view recipe'
- Make sure the ion canon shutter is retracted (black vertical knob on the left) and doesn't touch the sample holder.
- Press “source” on control panel (this step is optional, it is done automatically once you do the next step)
- To start etching press “beam” on control panel
- Elapsed time is shown on display. You must stop the system manually once the desired etching time is reached.
- Press “source” to stop
- Turn off main power for ion beam.
- Turn off rotating table.

When done
- Let ion gun cool by increasing Ar flow (1e-2 mbar, 2 min)
- If you cooled your sample, let the sample warm up for at least 15 min (08-04-21: Or do 5 min and do another 10 mins at 1 bar) while pumping (this to avoid possible pollution of oil or other things on your priceless sample).
- Close green Argon valve.
- Let the Argon be pumped out the conduct and set the Argon needle valve closed.
- Set black Argon valve to neutral
- Turn off turbo pump
- Turn off rotary pump
- Wait until turbo pump has decelerated
- Vent the system slowly with the “vent” switch (start with 1 sec)
- If you cooled with N2, you need to let your sample stay inside the lock at close to 1 bar (~10 mins) to let the sampleholder warm up. As long as it is below 0, Ice may form, once you remove it.
- Remove sample holder
- Pump chamber down for a few minutes with rotation pump (no turbo).
- Remove sample, clean sample holder with acetone and IPA.
- Shut down rotation pump if you are the last person on the day.
- Fill in the log sheets. COPIES OF THE LOG SHEET ARE HERE: ibe-logbookv2.xls.
Advanced options
- Pressure Gages:
- (10-1000 mBar) The high pressure gage 'DM' can be selected manually.
- (Below 10 mbar - “pirani”) you can switch to 'TM'.
- (High Vacuum - “penning”). The system will (should) automatically switch to the lowest pressure gage 'PM'. You can turn off the high vacuum pressure gage 'PM' “penning” by pressing 'HV'.
- You can see which pressure gage is active at the display indicator direcltly above it.
Pressure gauges
- Pressure Gauges:
- (10-1000 mBar) The high pressure gage 'DM' can be selected manually.
- (Below 10 mbar - “pirani”) you can switch to 'TM'.
- (High Vacuum - “penning”). The system will (should) automatically switch to the lowest pressure gauge 'PM'. You can turn off the high vacuum pressure gauge 'PM' “penning” by pressing 'HV'.
- You can see which pressure guage is active at the display indicator directly above it.
Pressure control unit: Leybold and Hereaus Combivac CM33.
The pressure control unit will switch automatically between the different pressure sensors.
DM (Capacitance gauge, 1000 to 10 mbar): Leybold CM1000
TM (Pirani gauge , 10 to 10e-3 mbar): Thermovac TR 216 Leybold
PM (Penning gauge , 10e-3 to 10e-8 mbar): Penningvac PR36
Etching rates
| Material | Date | User | Etched Thickness | Etching time | Recipe | Gas | Rate |
|---|---|---|---|---|---|---|---|
| Al | 20080708 | Jorina | 20 nm | 360 sec | 10 | Ar, 3.0e-4 mbar | 0.056 nm/sec |
| Al | 20151007 | Timothy | 9.9 nm | 180 sec | 10 | Ar, 3.0e-4 mbar | 0.055 nm/sec |
| Au | 20090518 | Christianne | 90 nm | 110 sec | 10 | Ar, 3.0e-4 mbar | 0.820 nm/sec |
| Au | 20111206 | Boltje | 19.7 nm | 30 sec | 10 | Ar, 4.0e-4 mbar | 0.660 nm/sec |
| Au | 20120404 | Boltje | 12.6 nm | 30 sec | 10 | Ar, 3.0e-4 mbar | 0.420 nm/sec |
| Co | 20110105 | Boltje | 22.3 nm | 150 sec | 10 | Ar, 3.2 e-4 mbar | 0.149 nm/sec |
| Co | 20111207 | Boltje | 33.6 nm | 168 sec | 10 | Ar, 4.0 e-4 mbar | 0.200 nm/sec |
| Co | 20120404 | Boltje | 7.4 nm | 30 sec | 10 | Ar, 3.0 e-4 mbar | 0.247 nm/sec |
| Cu | 20110112 | Boltje | 41.8 nm | 70 sec | 10 | Ar, 3.2 e-4 mbar | 0.597 nm/sec |
| Cu | 20111206 | Boltje | 23.1 nm | 42 sec | 10 | Ar, 4.0 e-4 mbar | 0.550 nm/sec |
| Cu | 20120404 | Boltje | 9.3 nm | 30 sec | 10 | Ar, 3.0 e-4 mbar | 0.310 nm/sec |
| LCMO(L401) | 20060621 | Christianne | 40.7 nm | 230 sec | 10 | Ar, 2.5e-4 mbar | 0.313 nm/sec |
| LCMO(L558) | 20091002 | Christianne | 20 nm | 240 sec | 9 | Ar, 2.5e-4 mbar | 0.083 nm/sec |
| LCMO(L566) | 20090520 | Christianne | 10 nm | 30 sec | 10 | Ar, 3.0 e-4 mbar | 0.330 nm/sec |
| MoGe | 20120403 | Boltje | 3.5 nm | 30 sec | 10 | Ar, 3.0e-4 mbar | 0.117 nm/sec |
| Nb | 20050311 | Chris | 50 nm | 232 sec | 10 | Ar, 2.5e-4 mbar | 0.215 nm/sec |
| Nb | 20101409 | Laurens | 100nm | 1080 sec | 10 | Ar, 3.2 e-4 mbar | 0.093 nm/sec |
| Nb | 20121114 | Stefano | 18.8 nm | 200 sec | 10 | Ar, 3.2 e-4 mbar | 0.094 nm/sec |
| Nb | 20140926 | Boltje | 28.3 nm | 420 sec | 10 | Ar, 2.9 e-4 mbar | 0.067 nm/sec |
| NbN | 20050215 | Olaf | 51.3 nm | 352 sec | 10 | Ar, 2.5e-4 mbar | 0.146 nm/sec |
| Ni | 20110117 | Boltje | 15.6 nm | 80 sec | 10 | Ar, 3.2 e-4 mbar | 0.195 nm/sec |
| Py | 20130603 | Boltje | 19.2 nm | 120 sec | 10 | Ar, 3.9 e-4 mbar | 0.160 nm/sec |
| Py | 20131120 | Henk | 32.4 nm | 150 sec | 10 | Ar, 3.0 e-4 mbar | 0.216 nm/sec |
Nb 20050311 based on 7:30 sputtering in UHV, 220 mA, 4 ubar, 0 angle, 258 A Xtal
Deposition rates
| Material | Date | User | Process parameters | Measurement | Time | Result | Rate | Notes |
|---|---|---|---|---|---|---|---|---|
| SiO2 | 20120907 | Boltje | 1090 oC | X-ray | 15 min | 15 nm | 1 nm/min | |
| SiO2 | 20140321 | Boltje | 1090 oC | X-ray | 30 min | 140 nm | 4.67 nm/min |