This is an old revision of the document!
Table of Contents
Description
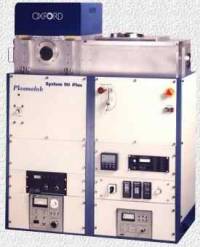
The Oxford PlasmaLab 90+ is a parallel plate etcher in the RIE configuration with a grounded upper electrode through which gas is injected and a RF driven lower electrode of which the RF power or self-bias can be set. 6 gas channels are available, gases can be mixed with MFC's, process pressure is regulated by feeding the value from the gas-independent baratron (diaphragm gauge) to an MKS control valve that throttles the turbo pump. Substrate temperature can be set from 0-60 C. The system has a loadlock and fully automated loading/unloading that allows use of toxic gases.
Current configuration: Fluorine etcher, SF6, CF4, O2, Ar, N2.
Manual PlasmaLab 90+
The technical logbook can be found here
DO NOT USE THIS SYSTEM FOR Ar+ SPUTTER ETCHING! USE THE IBE ETCHER INSTEAD!!!
Before you start
- You should have followed the intro for this apparatus and know the relevant safety measures (where to find emergency off switches, gas valves and fire alarms)
- Create an entry in the logbook, leaving sufficient space to document the result later on
- Log in
- In case the system is inactive:
- Start the chiller pump (611)
- Switch on chiller cooler(!) (611)
- Set 6.0 bar compressed air (611)
- Open BOTH (red) cooling water valves behind the system(!)
- Verify that purge N2 regulator setpoint is 1.5 bar
- Verify that vent N2 regulator setting is 0.6 bar
- Switch on chamber rotary pump (software, load panel)
- Switch on loadlock rotary pump (software, load panel)
- Evacuate chamber
- Close all gas cylinders (in 611 and 613)
- Perform a leaktest, pumpdown on time, time=0
- Repeat 3 times, now leak rate should be 0.0 mtorr/min, if not: stop & warn me!
- Stop & exit leak test
- If leaktight: open gas tanks. Check optimum setpoint of the pressure regulator as well (according to the Millipore / Tylan FC260 4V flow controller manual) is 30 psig, that's 2.0 bar absolute or 1.0 bar overpressure)
- Chamber must be at base pressure (<1e-5 torr) before processing
Loading your samples
DO NOT LEAVE THE LOADLOCK VENTED LONGER THAN 5 MINUTES
- Vent the loadlock if necessary (see below)
- WEAR GLOVES
- Make sure the quartz wafer is centered on the transfer mechanism, place your substrates or wafers on top
- Click button to evacuate loadlock, push down loadlock lid
- Loadlock must be at 1e-4 torr (preferably 1e-5) before loading
Conditioning the reactor
- Make sure chiller cooling is on and at desired temperature(!)
- With the 'Select' button, run the appropriate conditioning recipe
- Note actions in logbook
Process
- On the 'Load' page, click 'Load' to load the wafer
- With the 'Select' button, run the appropriate processing recipe, log to a file if desired
- Note actions in logbook
Unloading your samples
DO NOT LEAVE THE LOADLOCK VENTED LONGER THAN 5 MINUTES
- On the 'Load' page, click 'Unoad' to unload the wafer
- Click 'Vent' loadlock
- The system will go through 2 flushing cycles, then vent
- Remove substrates (ALWAYS WEAR GLOVES!)
- Pump down loadlock as described
When your sample is finished
DO WRITE YOUR FINDINGS IN THE LOGBOOK!!!!!!!!!!!!!!!!!!!!!!!!!!!!!!!!!!!!!!!!!!!!!!!!!!!!!!!!!!!
Etching rates
| Material | Date | Sample ID | Thickness | Etching time | Recipe | Gas | Rate |
|---|---|---|---|---|---|---|---|
| PMMA | 20050311 | bla | bla | 3:52 | 10 | O2, 50 mtorr | 0.215 nm/sec |
To ash PMMA/MMA double layer resist and/or clean your SiO2 chip from any other organic crap, use 20 min in 30Torr O2 plasma (30sccm flow, 16'C sample temp.)

